홈쇼핑 고객과 매출관리를 위한 프로그램이다. 회원등록 및 수정∙삭제, 회원 조회, 회원매출조회 업무가 가능하도록 하는 프로그램을 본 포스팅에서 다뤄보겠다.
1. 회원 정보와 매출 정보 테이블 생성
sql작성
CREATE TABLE MEMBER_TBL
 (
     custno     number(6)    primary key     -- 회원번호  숫자(6) 기본키 번호자동증가
    , custname  varchar2(30) not null        -- 회원이름  문자(30) 필수입력
    , phone     varchar2(20)                 -- 전화      문자(20)
    , address   varchar2(150)                -- 주소      문자(150)
    , joindate  date        default sysdate  -- 가입일        날짜 기본값 오늘
    , grade     varchar2(1)                  -- 고객등급      문자(1)
    , city      varchar2(2)                  -- 거주도시코드  문자(2)
 );
create sequence seq_custno
  start with    10001 --시작번호
  increment by  1
  minvalue      10001
  cache         20;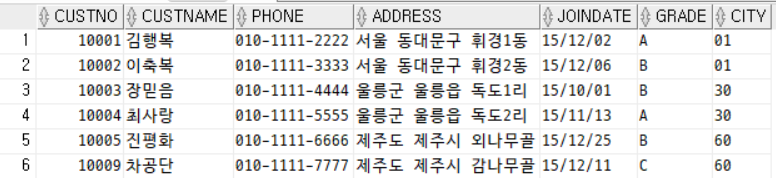
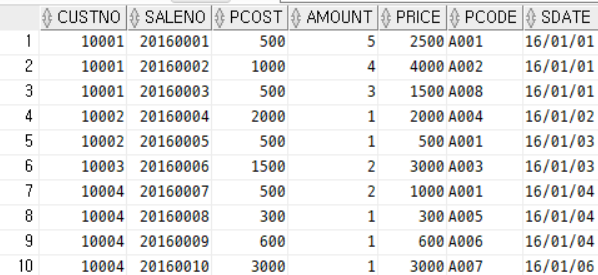
CREATE TABLE MONEY_TBL (
   CUSTNO  NUMBER(6),
   SALENO  NUMBER(8),
   PCOST   NUMBER(8),
   AMOUNT  NUMBER(4),
   PRICE   NUMBER(8),
   PCODE   VARCHAR2(4),
   SDATE   DATE,
   PRIMARY KEY (CUSTNO, SALENO)
)
2. 회원 관리 기능
– common.css : 스타일시트
– action.jsp : insert, update 등의 쿼리문 처리
– DBConnection.jsp : 데이터베이스 연결 담당
– bottom.jsp : 사이트 하단
– header.jsp : 사이트 상단
– index.jsp : 회원 추가
– list.jsp : 회원 목록
– money.jsp : 매출 정보
– update.jsp : 회원 정보 수정
– delete.jsp : 회원 정보 삭제
header.jsp
<%@ page language="java" contentType="text/html; charset=UTF-8"
	pageEncoding="UTF-8"%>
<header>
	<h3 class="logo">쇼핑몰 회원관리</h3>
	<nav class="gnb">
	<ul>
		<li><a href="index.jsp">회원등록</a></li>
		<li><a href="list.jsp">회원목록 조회/수정</a></li>
		<li><a href="money.jsp">회원매출조회</a></li>
		<li><a href="index.jsp">홈으로</a></li>
	</ul>
	</nav>
</header>
이때, @include되는 파일은 이미 html의 일부이므로 html인코더가 있으면 안된다.
bottom.jsp
<footer class="footer">copyright © 2024 Yujin All right reserved</footer> <!-- ©:@ -->
1) 회원 등록
DBConnection.jsp
<%
String driver = "oracle.jdbc.OracleDriver";
String url = "jdbc:oracle:thin:@localhost:1521:xe";
String dbuid = "jsp";
String dbpwd = "1234";

String sql = "";
Class.forName(driver);
Connection conn = DriverManager.getConnection(url, dbuid, dbpwd);
PreparedStatement pstmt = null;

System.out.println("Database 연결을 성공했습니다");
%>- Oracle 데이터베이스에 연결하기 위한 JDBC(Java Database Connectivity)를 사용한다. 이때, JDBC는 자바에서 데이터베이스에 연결하고, SQL 쿼리를 실행하며, 데이터를 주고받기 위한 Java API이다.
- 드라이버 타입 oracle:thin을 mySql으로 갈음할 수 있다.
- Class.forName(driver): OracleDriver 클래스를 메모리로 로드하는 과정
- PreparedStatement: 아직 구체적인 SQL 쿼리가 없기 때문에 null로 지정해두고, 나중에 선언한다.
index.jsp
<% int custno = 10001; %>
<!DOCTYPE html>
<html>
<head>
<meta charset="UTF-8">
<title>Insert title here</title>
<link rel="icon" type="image/x-icon" href="images/favicon.ico" />
<link rel="stylesheet" href="css/common.css" />
</head>
<body>
<%@include file="header.jsp" %>
<div class="container">
<div class="content">
<form action="action.jsp" method="POST">
<input type="hidden" name="action" value="insert" />
<!-- hidden: HTML에서 사용되는 숨겨진 입력 필드. 필드는 사용자에게 보이지 않지만, 폼이 제출될 때 서버로 데이터를 전송할 수 있음. -->
<h2>홈쇼핑 회원 등록 화면</h2>
<table>
<colgroup>
<col width="40%">
<col width="60%">
</colgroup>
<tbody>
<tr>
<th>회원번호(자동발생)</th>
<td>
<input type="text" name="custno" value="<%=custno %>" readonly />
<!-- custo를 line:1에서 초기값 설정해줘야함. --> <!-- readonly:사용자가 속성수정불가 -->
</td>
</tr>
<tr>
<th>회원성명</th>
<td>
<input type="text" name="custname" />
</td>
</tr>
<tr>
<th>회원전화</th>
<td>
<input type="text" name="phone" />
</td>
</tr>
<tr>
<th>회원주소</th>
<td>
<input type="text" name="address" />
</td>
</tr>
<tr>
<th>가입일자</th>
<td>
<input type="text" name="joindate" />
</td>
</tr>
<tr>
<th>고객등급</th>
<td>
<input type="radio" name="grade" id="gradeA" value="A" />
<label for="gradeA">VIP</label>
<input type="radio" name="grade" id="gradeB" value="B" />
<label for="gradeB">일반</label>
<input type="radio" name="grade" id="gradeC" value="C" />
<label for="gradeC">직원</label>
<input type="radio" name="grade" id="gradeD" value="D" checked />
<label for="gradeD">손님</label>
</td>
</tr>
<tr>
<th>도시코드</th>
<td>
<select name="city" id="citySel">
<option value="">선택</option>
</select>
</td>
</tr>
</tbody>
</table>
<div class="btn_group" style="text-align:center">
<button type="submit">등록</button>
<button type="button" onclick="location.href='list.jsp'">회원목록</button>
</div>
</form>
</div>
</div>
<%@include file="bottom.jsp" %>
<script>
let cityMap = new Map();
cityMap.set("01", "서울")
cityMap.set("02", "부산")
cityMap.set("03", "대구")
cityMap.set("04", "인천")
cityMap.set("05", "대전")
cityMap.set("06", "광주")
cityMap.set("30", "울릉")
cityMap.set("60", "제주")
console.log(cityMap)
let tag = ''
// [키, 값] 쌍을 대상으로 순회한다.
for (let [key, value] of cityMap) { // map.entries()와 동일
tag += '<option value="'+ key + '">' + value + '</option>'
}
const citySelEl = document.getElementById('citySel')
citySelEl.innerHTML += tag;
</script>
</body>
</html>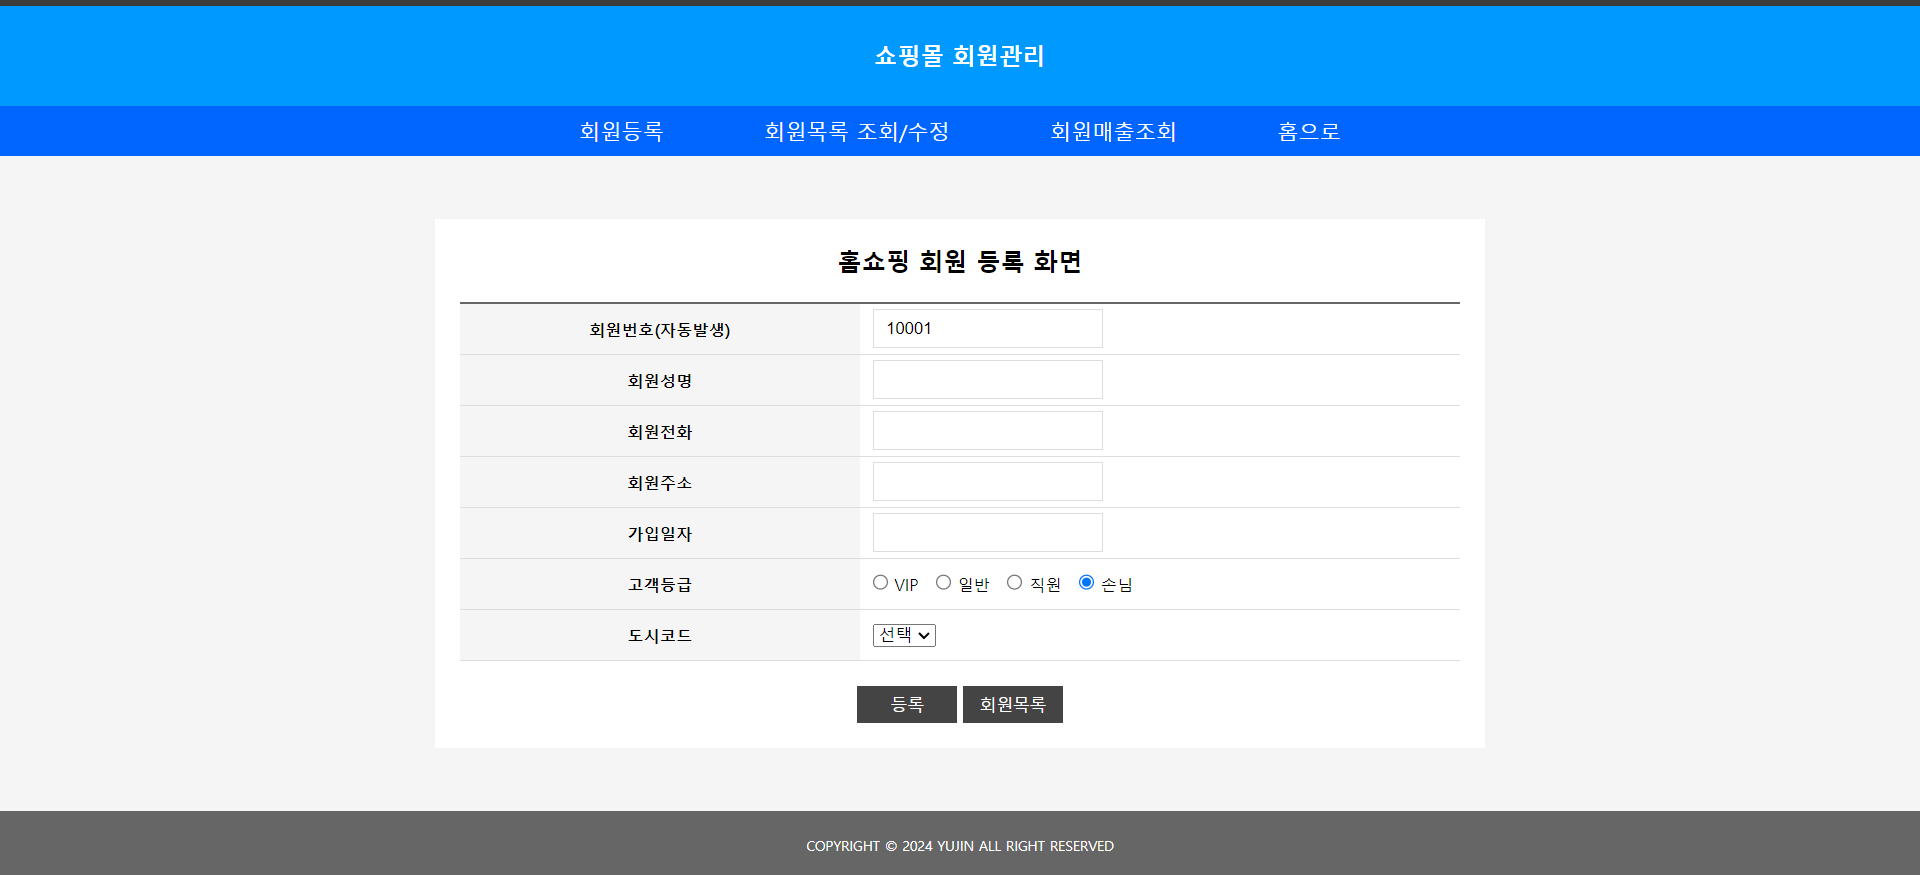
action.jsp
<%@ include file="DBConnection.jsp" %>
<%
// 넘어온 데이터 받아서
request.setCharacterEncoding("utf-8");
String action = request.getParameter("action");
String custno = request.getParameter("custno");
String custname = request.getParameter("custname");
String phone = request.getParameter("phone");
String address = request.getParameter("address");
String joindate = request.getParameter("joindate");
String grade = request.getParameter("grade");
String city = request.getParameter("city");

// 추가(insert)
switch (action) {
case "insert":
	sql = "INSERT INTO  MEMBER_TBL ";
	sql += "(CUSTNO, custname, phone, address, joindate, grade, city)";
	sql += " VALUES (seq_custno.NEXTVAL, ?,?,?,?,?,?)";
	pstmt = conn.prepareStatement(sql);
	pstmt.setString(1, custname);
	pstmt.setString(2, phone);
	pstmt.setString(3, address);
	pstmt.setString(4, joindate);
	pstmt.setString(5, grade);
	pstmt.setString(6, city);
	break;
case "update":
	sql = "UPDATE MEMBER_TBL SET custname=?, phone=?, address=?, joindate=?, grade=?, city=? WHERE CUSTNO=?";
	pstmt = conn.prepareStatement(sql);
	pstmt.setString(1, custname);
	pstmt.setString(2, phone);
	pstmt.setString(3, address);
	pstmt.setString(4, joindate);
	pstmt.setString(5, grade);
	pstmt.setString(6, city);
	//pstmt.setInt(7, Integer.parseInt(custno));
	break;
}

pstmt.executeUpdate();

pstmt.close();
conn.close();

// 목록 보기로 돌아가기
response.sendRedirect("list.jsp");
%>pstmt.executeUpdate();- executeUpdate(): INSERT, UPDATE, DELETE와 같은 데이터베이스의 상태를 변경하는 쿼리를 실행할 때 사용된다.
3) 회원 정보 조회
<%@ include file="DBConnection.jsp"%>

<%
//회원정보 리스트 가져오기 oracle에서
sql = "SELECT*FROM MEMBER_TBL";
sql += " ORDER BY CUSTNO ASC";

pstmt = conn.prepareStatement(sql);
ResultSet rs = pstmt.executeQuery();

String tag = "";
while (rs.next()) {
	int custno = rs.getInt("custno");
	String custname = rs.getString("custname");
	String phone = rs.getString("phone");
	String address = rs.getString("address");
	String joindate = rs.getString("joindate").substring(0,10);
	String grade = rs.getString("grade");
	String city = rs.getString("city");

	String gradename="";
	switch(grade){
	case "A" : gradename="VIP"; break;
	case "B" : gradename="일반"; break;
	case "C" : gradename="직원"; break;
	case "D" : gradename="손님"; break;
	}

	HashMap<String, String> cityMap= new HashMap<>();
	cityMap.put("01", "서울");
	cityMap.put("02", "부산");
	cityMap.put("03", "대구");
	cityMap.put("04", "인천");
	cityMap.put("05", "대전");
	cityMap.put("06", "광주");
	cityMap.put("30", "울릉");
	cityMap.put("60", "제주");

	String cityname=cityMap.get(city);

	String fmt = "";
	fmt+="<tr>";
	fmt += "<td><a href=\"./update.jsp?custno=%d\">%d</a></td>";
	fmt+="<td>%s</td>";
	fmt+="<td>%s</td>";
	fmt+="<td>%s</td>";
	fmt+="<td>%s</td>";
	fmt+="<td>%s</td>";
	fmt+="<td>%s</td>";
	fmt+="</tr>";

	tag+=String.format(fmt,
			custno, custno, custname, phone, address, joindate, gradename, cityname);
}
%>

<!DOCTYPE html>
<html>
<head>
<meta charset="UTF-8">
<title>list</title>
<link rel="icon" type="image/x-icon" href="images/favicon.ico" />
<link rel="stylesheet" href="css/common.css" />
<style>
td{text-align: center;}
</style>
</head>
<body>
	<%@include file="header.jsp"%>
	<div class="container">
		<div class="content">
			<h2>홈쇼핑 회원목록</h2>
			<table>
			<colgroup>
			<col width="11%">
			<col width="11%">
			<col width="17%">
			<col width="24%">
			<col width="15%">
			<col width="11%">
			<col width="15%">
			</colgroup>
				<thead>
					<tr>
						<th>회원번호</th>
						<th>회원성명</th>
						<th>전화번호</th>
						<th>주소</th>
						<th>가입일자</th>
						<th>고객등급</th>
						<th>거주지역코드</th>
					</tr>
				</thead>
				<tbody>
					<%=tag%>
				</tbody>
			</table>
		</div>
	</div>
	<%@include file="bottom.jsp"%>
</body>
</html>
fmt += "<td><a href=\"./update.jsp?custno=%d\">%d</a></td>";- ?:경로와 쿼리문자열을 구분하는 기호
- 쿼리 문자열은 하나 이상의 파라미터를 포함할 수 있으며, 각 파라미터는 key=value 형식으로 정의된다.
- 여러 개의 파라미터는 & 기호로 구분된다.
- JSP나 서블릿에서는 request.getParameter("paramName") 메서드를 사용하여 쿼리 문자열에서 특정 파라미터 값을 가져올 수 있다.

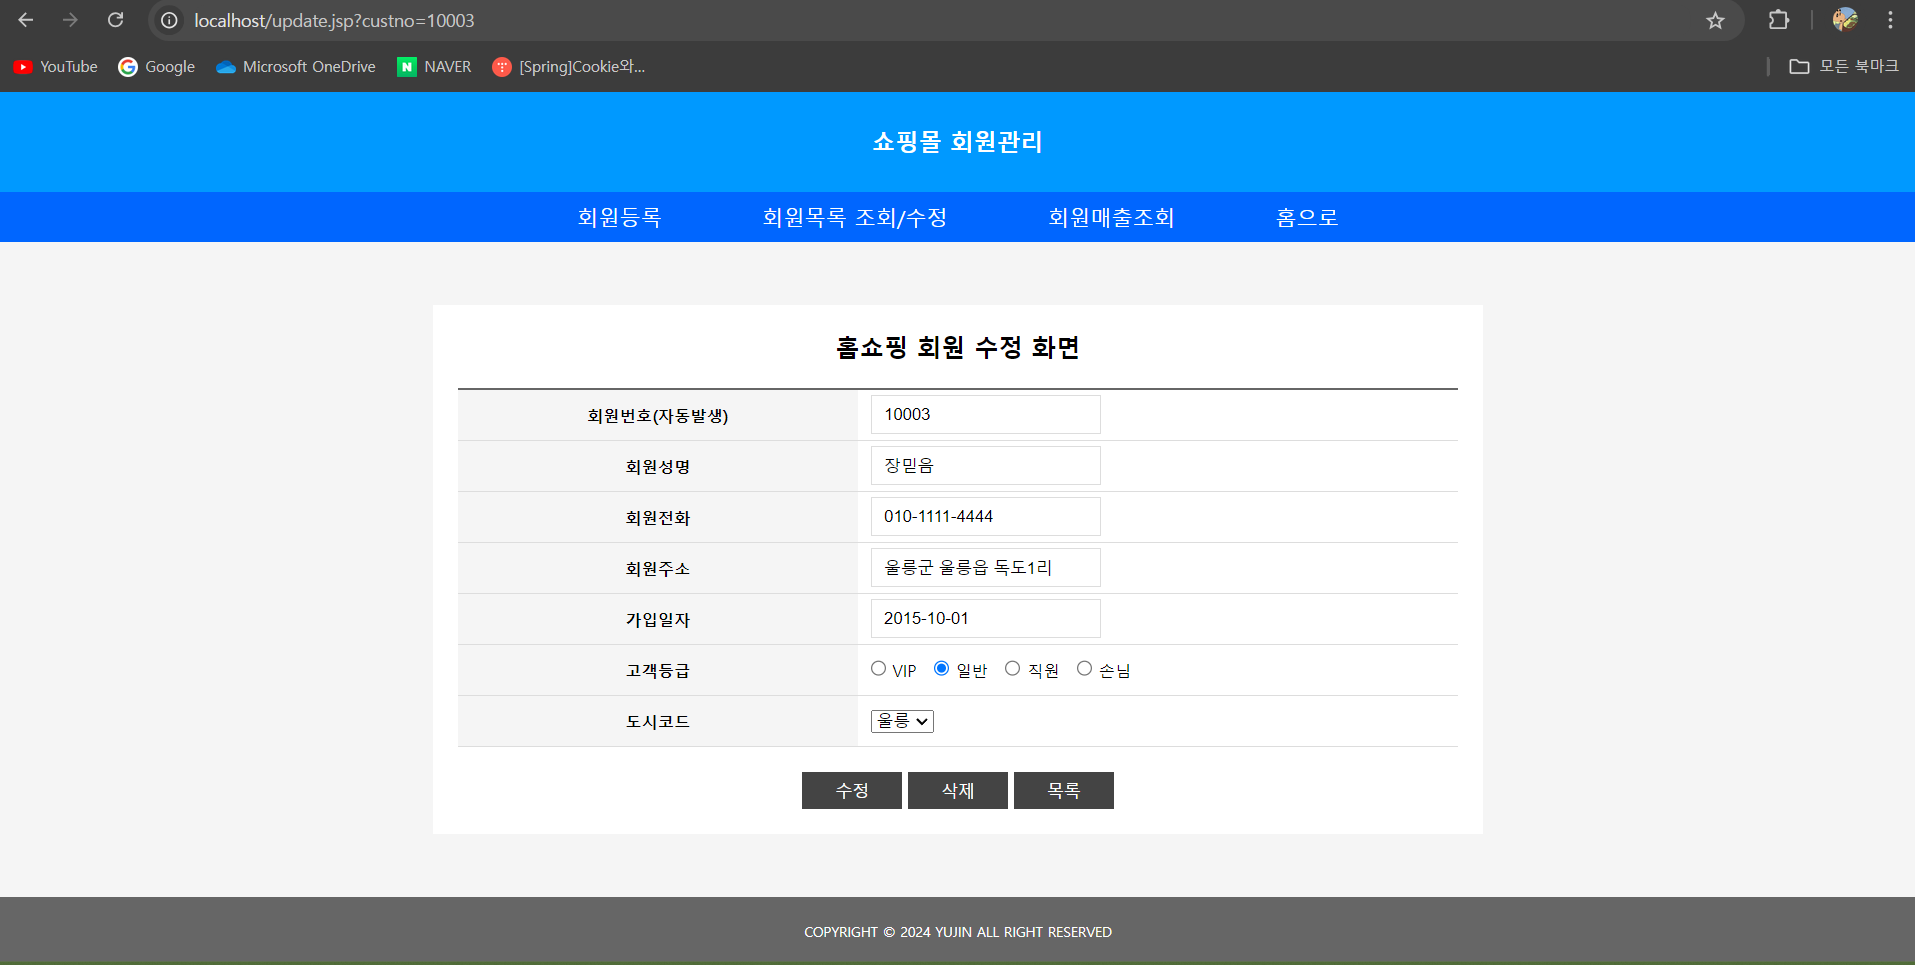
2) 회원 수정
update.jsp
<%@ include file="DBConnection.jsp"%>

<%
//회원정보 가져오기 list에서
request.setCharacterEncoding("utf-8");
//request.getParameter를 통해 파라미터를 가져온다.

sql = "SELECT * FROM MEMBER_TBL WHERE custno=?";
pstmt = conn.prepareStatement(sql);
pstmt.setInt(1, Integer.parseInt(custno));
ResultSet rs = pstmt.executeQuery();

while (rs.next()) {

	custname = rs.getString("custname");
	phone = rs.getString("phone");
	address = rs.getString("address");
	joindate = rs.getString("joindate").substring(0,10);
	grade = rs.getString("grade");
	city = rs.getString("city");
}

%>

<!DOCTYPE html>
<html>
<head>
<meta charset="UTF-8">
<title>update</title>
<link rel="icon" type="image/x-icon" href="images/favicon.ico" />
<link rel="stylesheet" href="css/common.css" />
</head>
<body>
<%@include file="header.jsp" %>

  <div  class="container">
    <div  class="content">
     <form action="action.jsp" method="POST">
      <input type="hidden"  name="action" value="update" />
      <h2>홈쇼핑 회원 수정 화면</h2>
      index.jsp와 동일
      <div class="btn_group" style="text-align:center">
         <button  type="submit">수정</button>
         <!-- <td><a href=\"./update.jsp?custno=%d\">%d</a></td> -->
         <button type="button" onclick="location.href='delete.jsp?custno=<%=custno %>'">삭제</button>
         <button  type="button" onclick="location.href='list.jsp'">목록</button>
      </div>
     </form>
    </div>
  </div>

  <%@include file="bottom.jsp" %>

    <script>
<!--index.jsp와 동일-->

  </script>
</body>
</html>
rs = pstmt.executeQuery();- select문을 통해 데이정보를 불러온다.
while (rs.next()) {
    custname = rs.getString("custname");
    phone = rs.getString("phone");
    address = rs.getString("address");
    joindate = rs.getString("joindate").substring(0,10);
    grade = rs.getString("grade");
    city = rs.getString("city");
}- list.jsp에서 조회된 각 정보를 불러온다.
<form action="action.jsp" method="POST">
    <input type="hidden" name="action" value="update" />
    <button type="submit">수정</button>
</form>- 폼 전송: 수정 버튼을 클릭하면 <form> 태그의 action 속성에 지정된 action.jsp로 POST 요청이 전송된다.
- 전송 데이터: action이라는 이름의 hidden input 필드에 "update"라는 값이 설정되어 있다.
- action.jsp에서의 처리: action.jsp 파일에서는 이 요청을 받아서 action 파라미터의 값이 "update"인지 확인하고, 해당하는 로직을 수행하게 된다.
3) 회원 삭제
<%@page import="java.sql.*"%>
<%@ page language="java" contentType="text/html; charset=UTF-8"
	pageEncoding="UTF-8"%>
<%@ include file="DBConnection.jsp"%>
<%

sql = "DELETE FROM MEMBER_TBL";
sql += " WHERE CUSTNO = ?";

String custno = request.getParameter("custno");
pstmt = conn.prepareStatement(sql);
pstmt.setString(1, custno);
pstmt.executeUpdate(); // 자동 commit 실행된다
out.println("<script>alert('회원번호: " + custno + "번이 삭제되었습니다.');</script>");

pstmt.close();
conn.close();

out.println("<script>window.location.href='list.jsp';</script>");

%>
sql += " WHERE CUSTNO = ?";- ?는 준비된 구문에서 파라미터로 사용될 자리 표시자
String custno = request.getParameter("custno");- custno: 클라이언트에서 요청한 파라미터(custno)를 받아온다. 이 값은 삭제할 회원의 고객 번호를 의미
pstmt = conn.prepareStatement(sql);- sql쿼리 실행
pstmt.setString(1, custno);- ?에 불러온 prepareStatementd의 1번째 문자열에 custno값을 집어넣는다.
out.println("<script>window.location.href='list.jsp';</script>");- response.sendRedirect("list.jsp");가 호출되면 서버는 클라이언트에게 새로운 페이지로 이동하라는 응답을 즉시 보내게 된다.
이 경우, 그 이전에 작성한 out.println("<script>alert('회원번호: " + custno + "번이 삭제되었습니다.');</script>"); 코드는 실행되지만, 리다이렉션이 발생하기 때문에 alert 창이 표시되기 전에 페이지가 변경된다.response.sendRedirect("list.jsp");
∴ alert()가 제대로 표시되기 위해서는 리다이렉션을 JavaScript로 처리해야


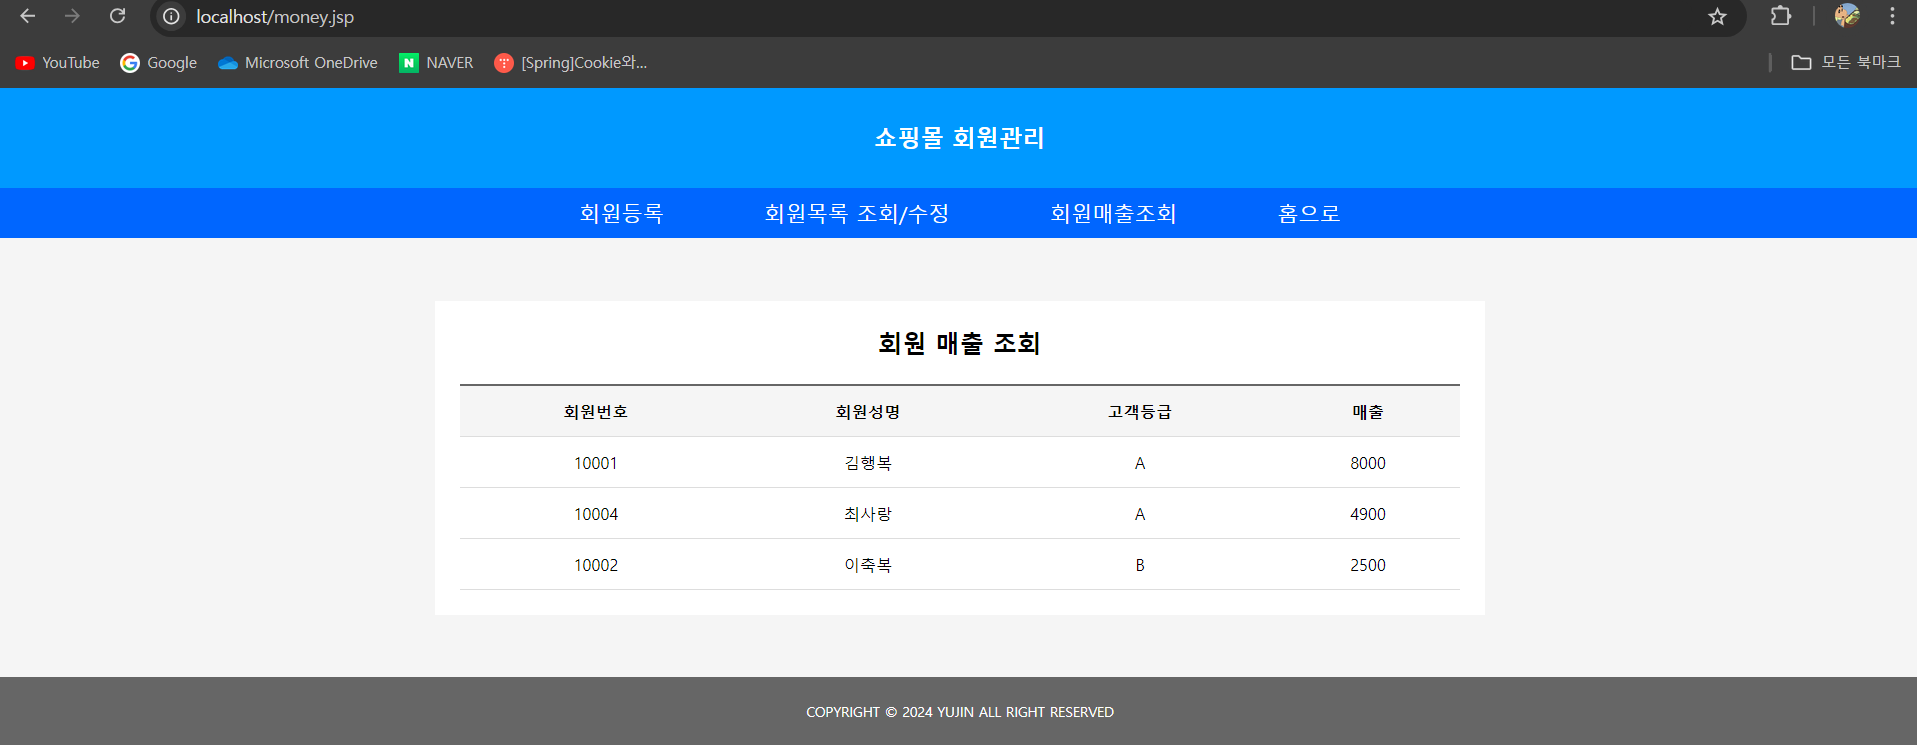
3. 회원 매출 조회
<%@ page language="java" contentType="text/html; charset=UTF-8"
	pageEncoding="UTF-8"%>
<%@ include file="DBConnection.jsp"%>

<%
sql = "SELECT MB.CUSTNO, MB.CUSTNAME, MB.GRADE, SUM(MN.PRICE) total";
sql += " FROM MEMBER_TBL MB JOIN MONEY_TBL MN ON MB.CUSTNO=MN.CUSTNO";
sql += " GROUP BY (MB.CUSTNO, MB.CUSTNAME, MB.GRADE)";
sql += " ORDER BY total DESC";

pstmt = conn.prepareStatement(sql);
ResultSet rs = pstmt.executeQuery();

String tag = "";
while (rs.next()) {
	int custno = rs.getInt("custno");
	String custname = rs.getString("custname");
	String grade = rs.getString("grade");
	int total = rs.getInt("total");

	String fmt = "";
	fmt += "<tr>";
	fmt += "<td>%d</td>";
	fmt += "<td>%s</td>";
	fmt += "<td>%s</td>";
	fmt += "<td>%d</td>";
	fmt += "</tr>";

	tag += String.format(fmt, custno, custname, grade, total);
}
%>
<!DOCTYPE html>
<html>
<head>
<meta charset="UTF-8">
<title>Insert title here</title>
<link rel="icon" type="image/x-icon" href="images/favicon.ico" />
<link rel="stylesheet" href="css/common.css" />
<style>
tr{
text-align: center;}
</style>
</head>
<body>
	<%@include file="header.jsp"%>
	<div class="container">
		<div class="content">
			<h2>회원 매출 조회</h2>
			<table>
				<thead>
					<tr>
						<th>회원번호</th>
						<th>회원성명</th>
						<th>고객등급</th>
						<th>매출</th>
					</tr>
				</thead>
				<tbody>
					<%=tag%>
				</tbody>
			</table>
		</div>
	</div>
	<%@include file="bottom.jsp"%>
</body>
</html>
sql문에만 조금 수정이 있을뿐 전체적인 형식은 회원정보조회와 크게 다르지 않다.
'JSP' 카테고리의 다른 글
| [jsp]로그인 및 회원가입 페이지 만들기 (1) | 2024.10.02 |
|---|